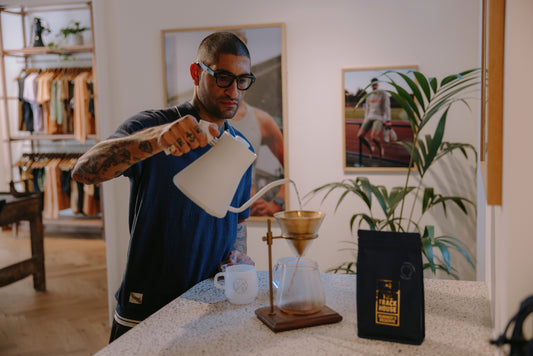


Being able to brew great coffee wherever and whenever you need it most has always been a key aim of ours. No matter where you are or what equipment you have with you, you should still be able to brew the best cup of coffee possible.
Nowhere is this truer than in the great outdoors, whether that's camping in the wild or hiking up a mountain -- a great cup of coffee is the perfect accompaniment.
Over the recent Summer Solstice weekend, Sheffield-based bikepacking brand, Pannier, set up camp at Stanage Edge in the Peak District and invited tourers to join them for a few days of riding and socialising out in the wild. We roasted a batch of our Rwandan filter, Kirehe Remera, for them to brew up each day.
But brewing in the wild provides some unique challenges and so with practicality in mind, and travelling light a priority, we also put together a few tips to help keep your coffee tasting sweet even with a more lo-fi brewing set-up.

Aeropress
Use a metal filter
You can leave paper ones at home, so the filter holder isn't taking up the space of half a water canteen. Metal filters allow more oils and fine sediment into your cup, and need rinsing and wiping off once you've brewed, thus ensuring the oils don't turn rancid and taint your next cup.
Use a scoop
Every AeroPress comes with a scoop which promptly gets tossed into the "random things" drawer in everyone's kitchen. It's actually pretty decent. The spoon end of a spork (below) also makes for a good alternative.

Grind a touch coarser
You should be using a Porlex when camping; it slots into your AeroPress chamber when packing, is quick, and doesn't require an energy source besides yourself. Rather than trying to squeeze down your AeroPress with a considerable amount of force when you're likely brewing on an uneven tree stump or a mossy woodland floor, go for a coarser grind and longer steep time, with an extended stir to make sure the coffee extracts properly. A coarser grind will also make plunging through a metal filter that little bit easier.

Brew inverted
Make sure the rubber bung is securely in place in the brewing chamber and add your ground coffee. Then slowly top up with freshly boiled water to just shy of the brim of the AeroPress a this equates to around 250g of water. Get stirring and leave for a few minutes to steep before placing the filter and cap in place, flipping onto your tin travel mug, and slowly plunging.
Pourover
Take pre-rinsed filter papers
If you're the kind of person to be doing pour-over brewing in the woods, you sound pretty into your coffee. For single cup brewing, the taste of a filter paper will come through if it's unrinsed, but when camping, water and heat will be in short supply compared to back home. Therefore when packing, spend a minute a few days before you leave rinsing a short stack of filter papers in your pourover cone, letting them dry before popping into your rucksack. That way you can brew straight away without having to boil extra water.

Grind a little finer than normal
This might sound counter-intuitive given the AeroPress brewing advice to grind coarser whilst camping but bear with me. The hard part of pourover brewing without scales is getting an accurate coffee-to-water ratio. We all know the right amount of coffee to water, ground on the correct grind setting gets you a cup of coffee which is well extracted and brewed to the proper strength. What we propose you do in the woods, however, is to purposefully brew a cup that's a bit too strong, but is properly extracted. Then, to dilute the concentrated cup and open up the flavours, add a little hot water to taste.

Aim for a large bloom and higher brew bed throughout
As you won't be packing a gooseneck kettle, pouring carefully, slowly and accurately, in all likelihood, won't be possible. To counteract this, and still get an even extraction, start by pouring quite a lot of water onto the grounds, more than you would at home. Get a spoon in there and make sure that all the grounds are wet in this initial slurry, before continuing to pour. Keep the level of water quite high in your cone, as this will hopefully achieve a higher temperature in the brew slurry. Maintaining a high temperature, combined with a finer grind, means you'll be able to extract all the delicious flavours from your ground coffee, with less water than you would use to pour through the coffee bed at home.
Dilute
When you feel like you've got a strong cup of coffee under the cone, take it off and taste it. Add a splash more hot water, mix and taste again. Keep doing so until the coffee is at your desired strength then savour and enjoy.

Share: